📊 Dashboard Overview
The X2Proxy control panel gives you full visibility and control over your proxy usage. Each pool you have access to (e.g. Residential Pool 1, Residential Pool 2) appears in the left sidebar — selecting one opens the tabs described below. The top bar on every tab shows your remaining Traffic balance, the date it stays active until, a Buy Traffic shortcut, and the language switcher.
📝 Note
The features below apply to rotating-type proxy pools — pools built around IP rotation: residential, mobile, and datacenter.
🛠️ Proxy Creation
The Proxy Creation tab generates ready-to-use proxy connection strings without building them by hand.
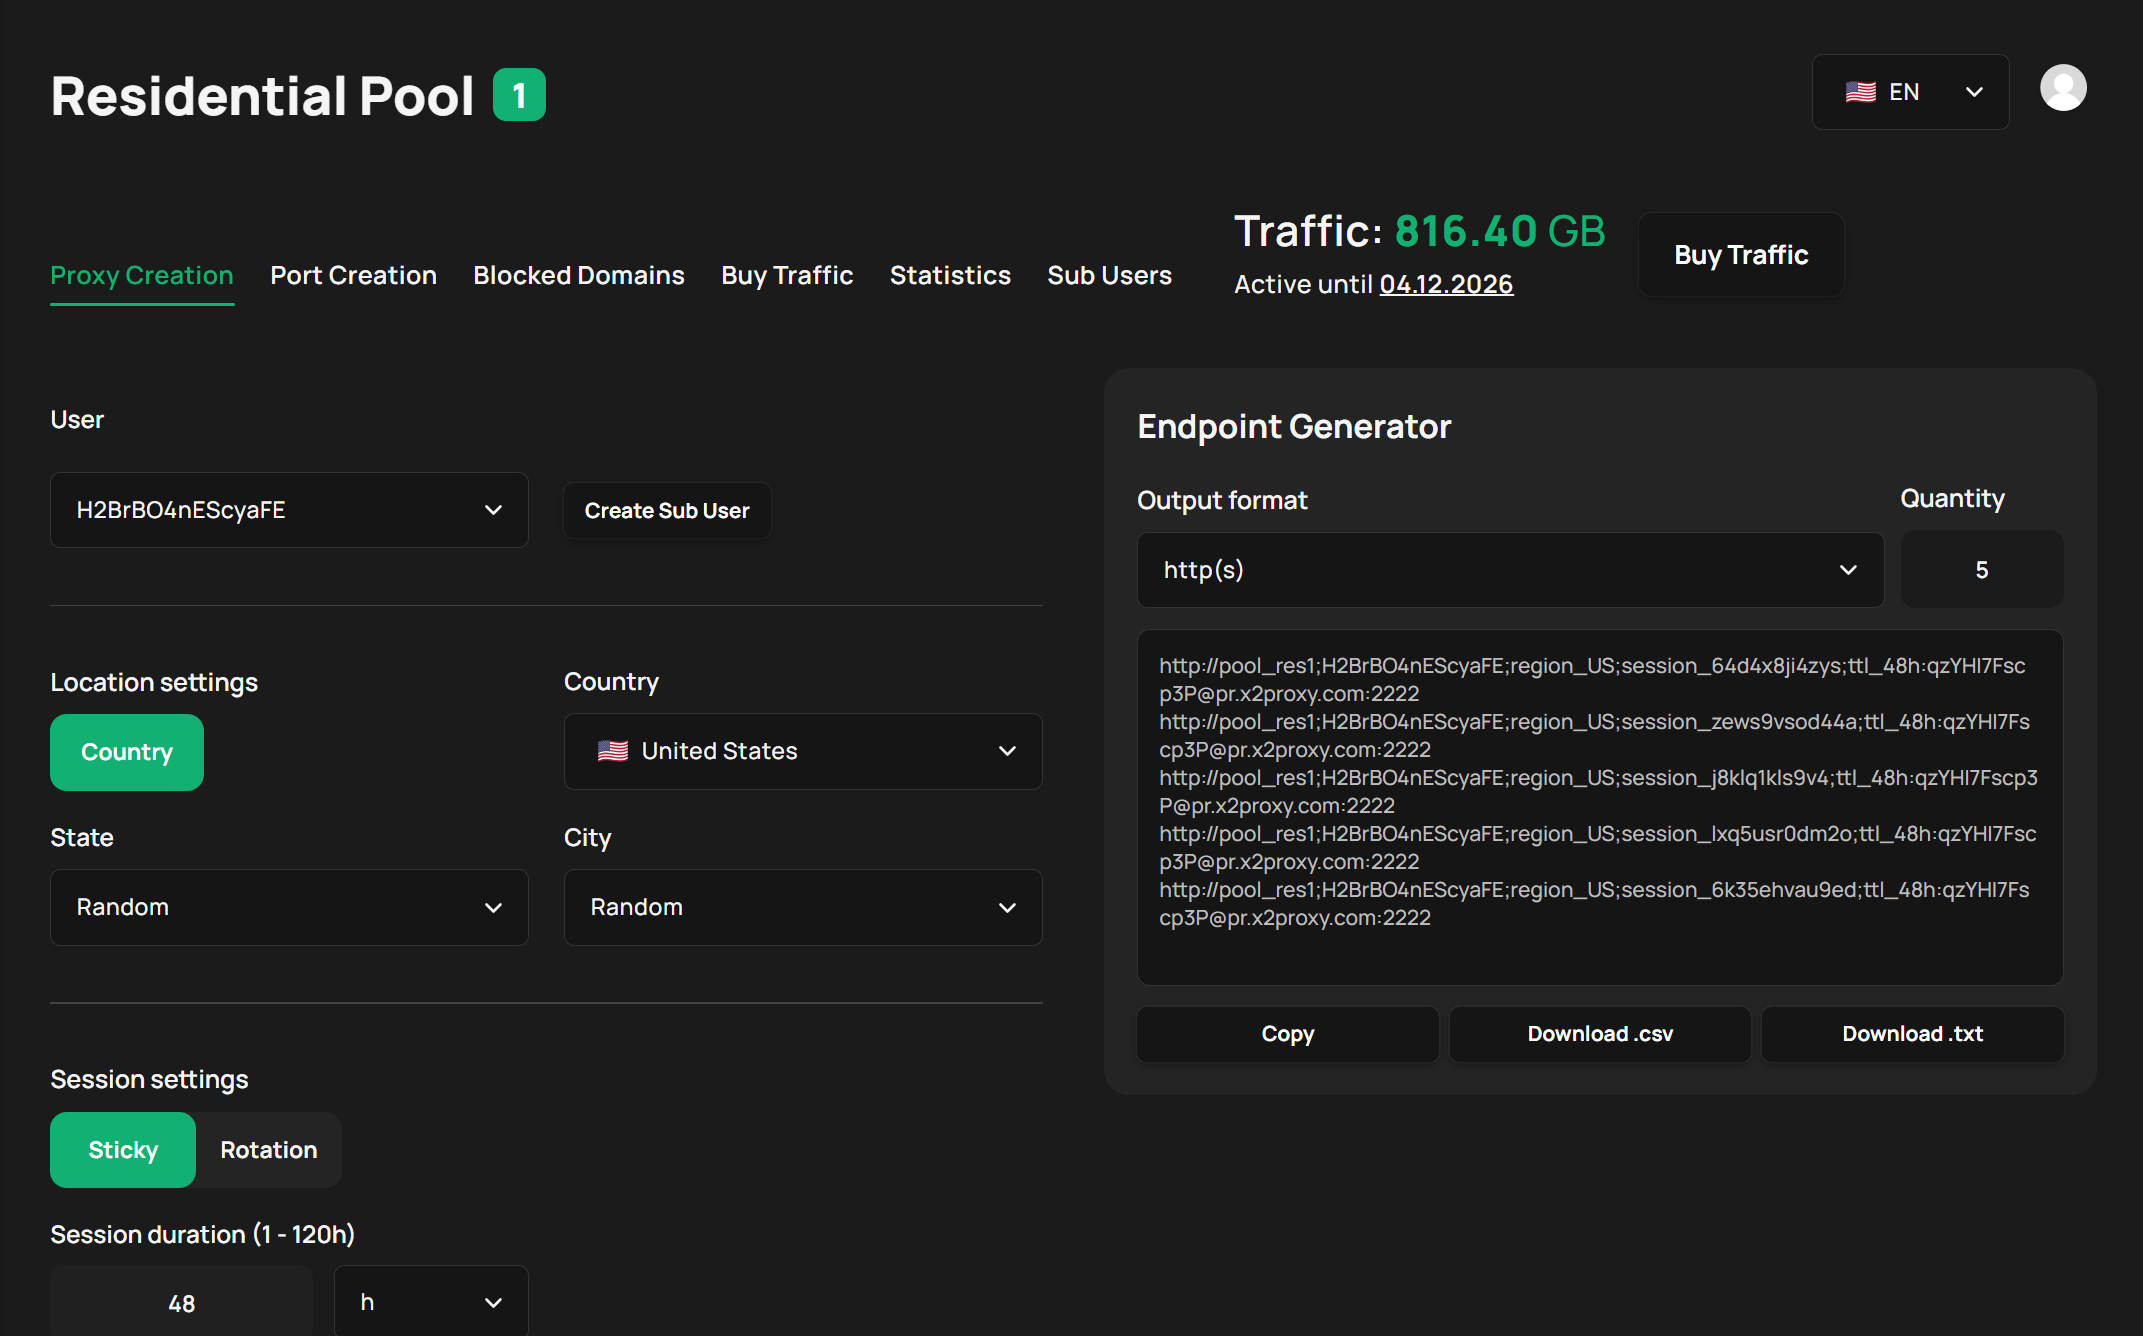
- User — pick which sub-user (see Sub Users below) the generated proxies are issued under. Create Sub User adds a new one on the spot.
- Location settings — narrow down where the IPs are located:
- Country — target a specific country
- State — target a specific state/region, or leave on Random
- City — target a specific city, or leave on Random
- Session settings:
- Sticky / Rotation — hold the same IP for a period, or get a new IP on every request
- Session duration (1–120h) — how long a Sticky session holds its IP
- Endpoint Generator:
- Output format — the connection string format, e.g.
http(s) - Quantity — how many strings to generate at once
- Copy / Download .csv / Download .txt — export the generated list
- Output format — the connection string format, e.g.
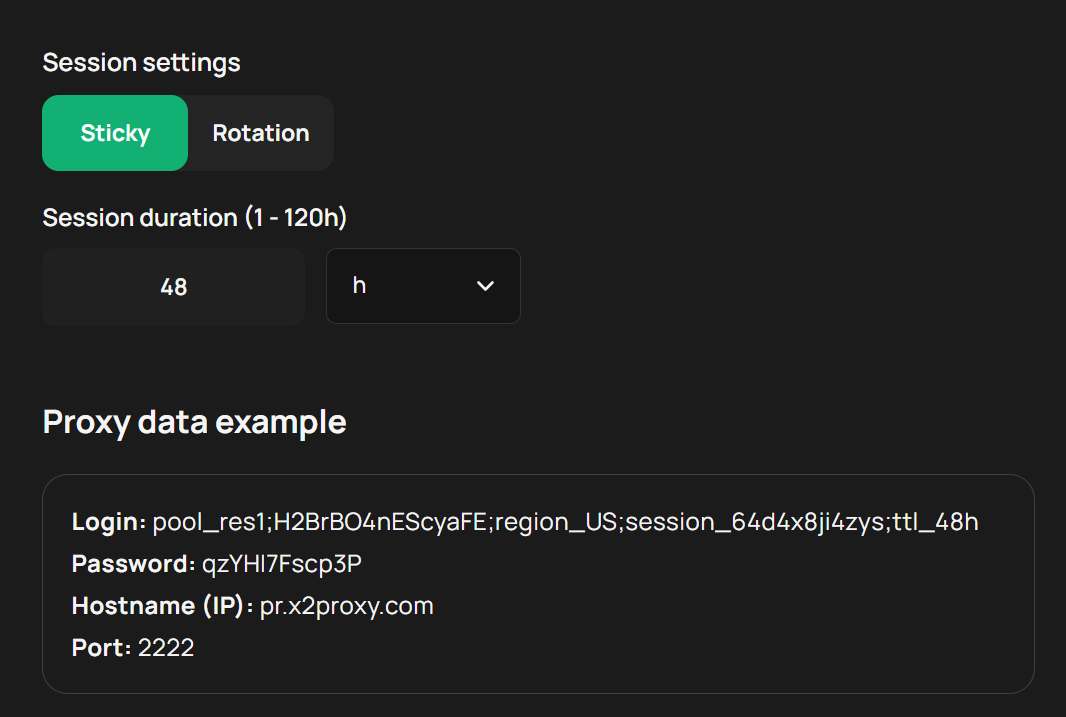
- Proxy data example — breaks the first generated string down into its parts (Login, Password, Hostname (IP), Port) so you can see exactly what each field means.
🔌 Port Creation
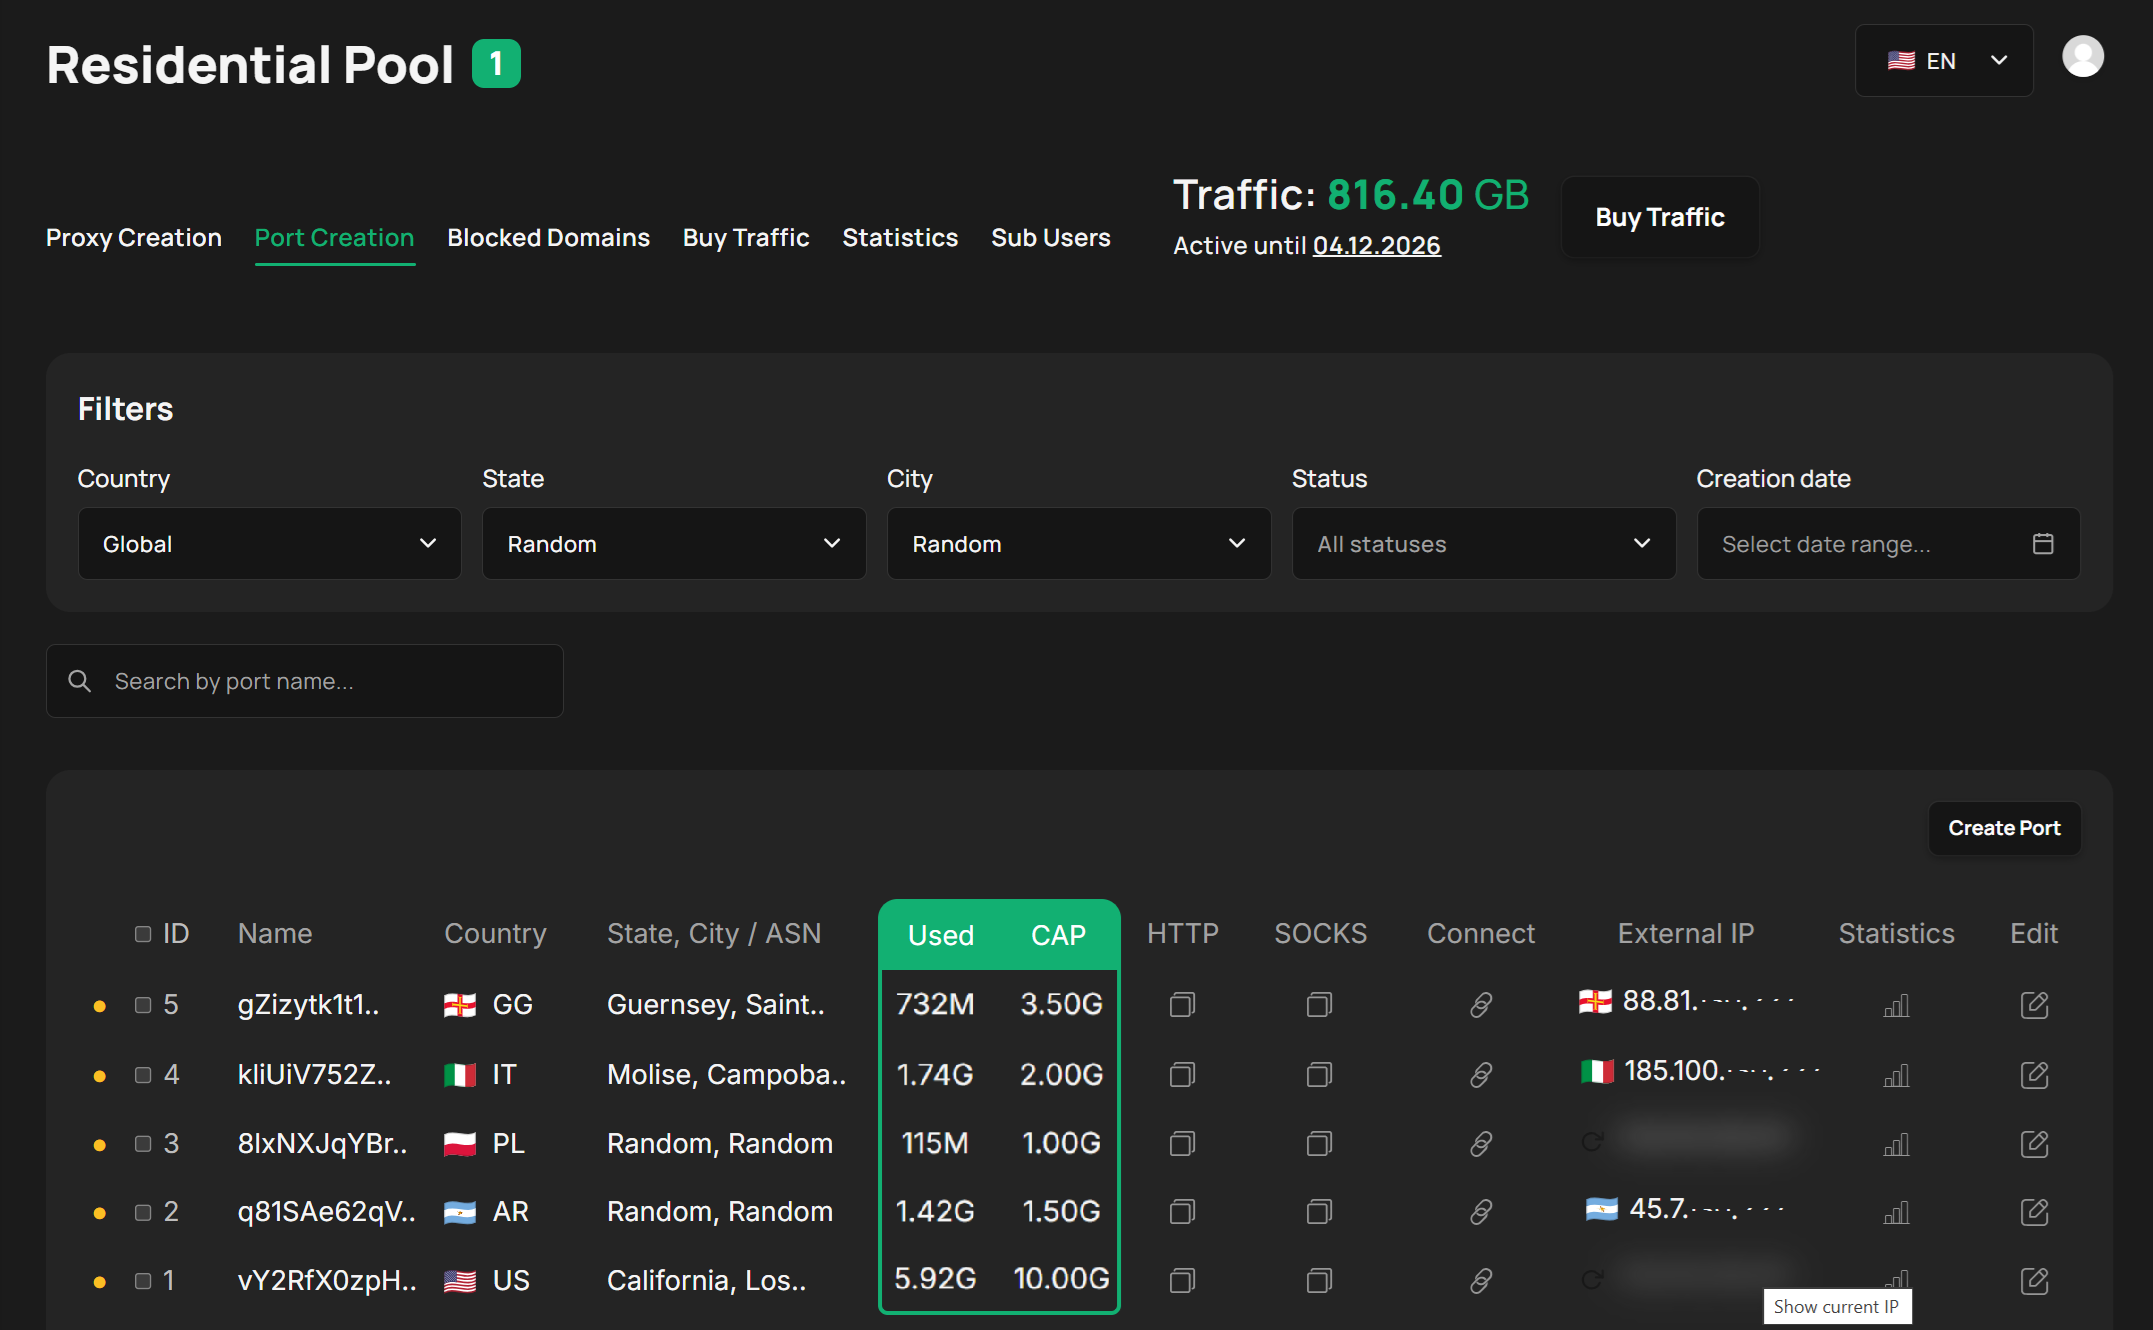
The Port Creation tab turns a proxy configuration into a fixed, named endpoint — a port — with its own credentials, instead of a one-off generated string.
A port is useful well beyond just "another way to get a string":
- Set it once, manage it forever — paste a port's connection string into an antidetect browser profile (or any other tool) a single time. From then on, change its country, session type, or traffic cap from the dashboard — the credentials never change, so the profile never needs touching again.
- Selling accounts — hand a buyer a dedicated port so they can verify the account through it before and after the sale, then simply disable that one port from the interface once the deal is done — no need to reissue or revoke anything else.
- Team access — issue individual ports to employees and disable any single one instantly, without affecting the rest.
- Rotate or check the external IP from the dashboard — the refresh control on each port (tooltip: Show current IP) lets you get a new external IP or just view the current one, right in the interface.
- Built for automation — every one of these actions (create a port, read its external IP, rotate it, adjust its cap) is also exposed through the API, so you can manage large numbers of ports programmatically.
Filters narrow the port list by Country, State, City, Status, or Creation date, or search by port name.
Create Port opens a form:
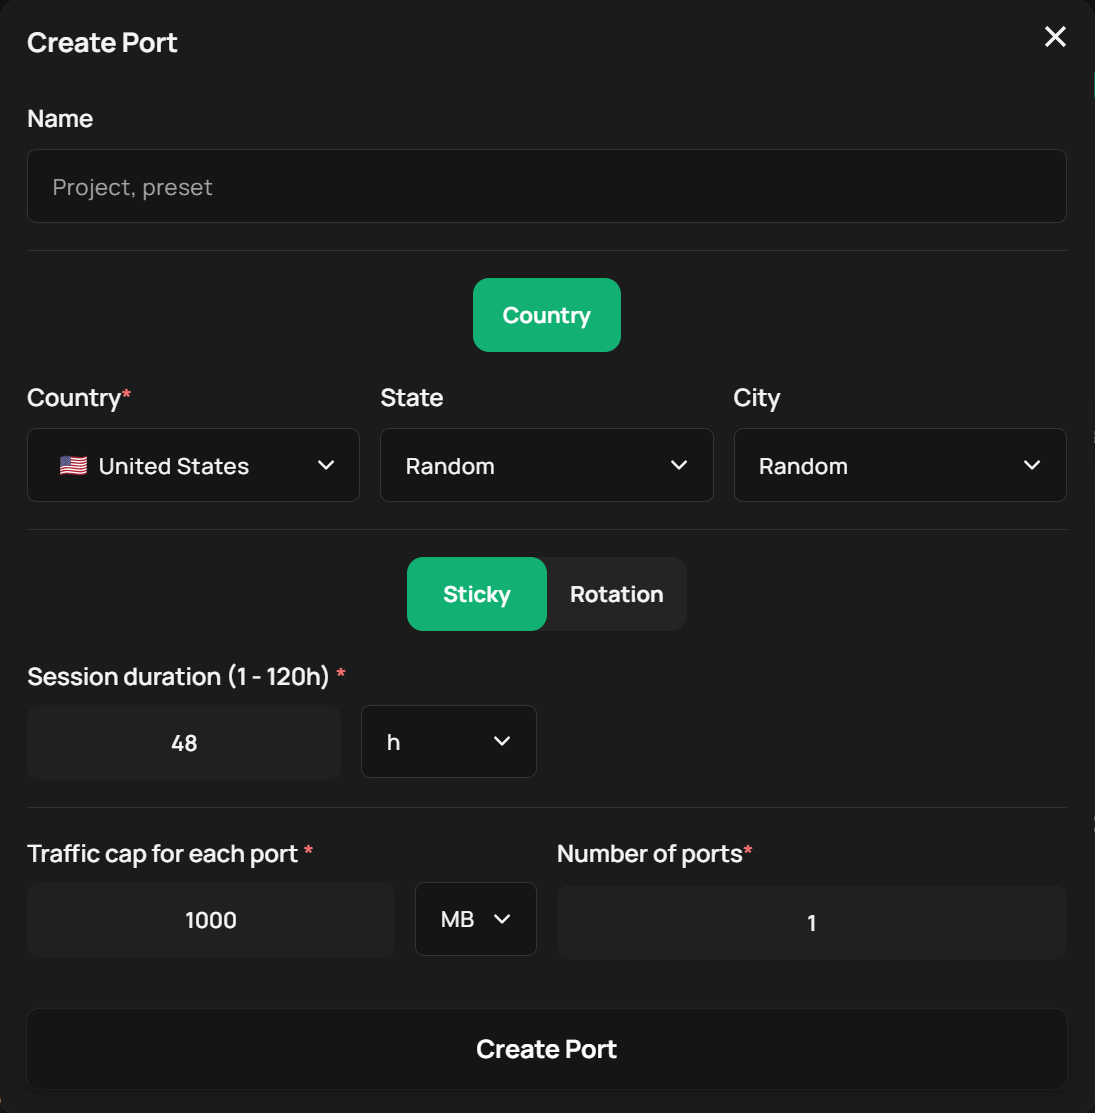
- Name — a label for the port (project or preset name)
- Country / State / City — location targeting
- Sticky / Rotation — session type
- Session duration (1–120h) — for Sticky ports
- Traffic cap for each port — a per-port traffic limit
- Number of ports — create several identical ports in one go
Each row in the port list shows its ID and Name, Country and State, City / ASN, Used / CAP (traffic consumed vs. its cap), buttons to copy the ready string in HTTP or SOCKS format, a Connect link that opens the port's Proxy connection details (username, password, host, port), its current External IP with a refresh control, a shortcut to its filtered Statistics, and Edit to change any of its settings.
🚫 Blocked Domains
In accordance with the Terms of Service, some domains are blocked due to a high risk of fraud. Some of them can be unblocked after identity verification (KYC).
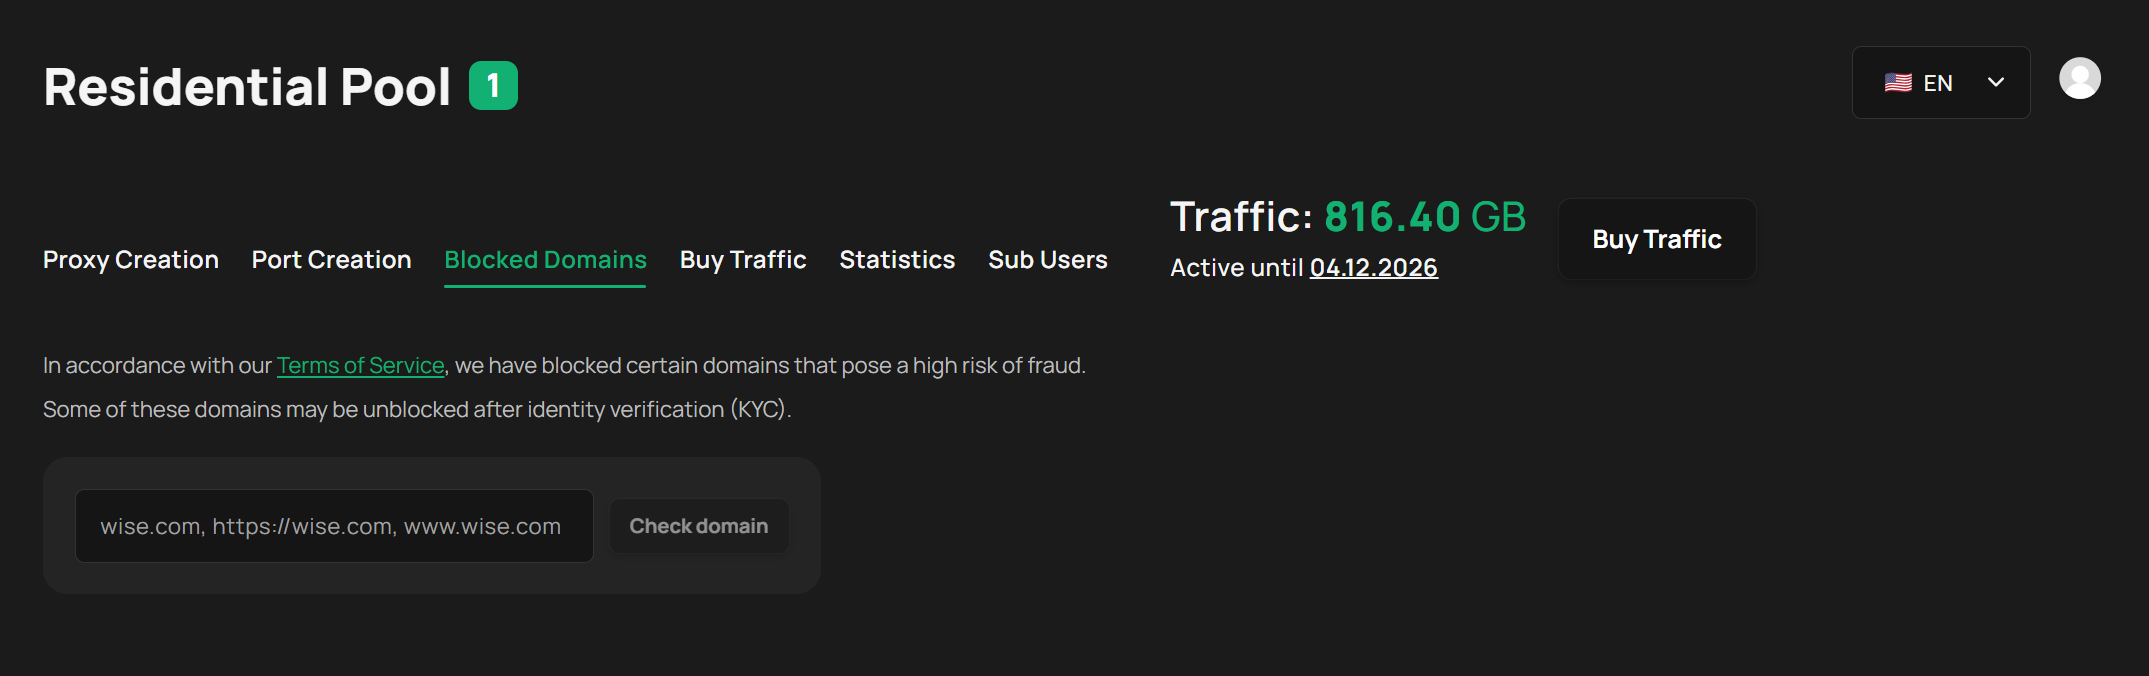
- Enter a domain —
wise.com,https://wise.com, andwww.wise.comare all accepted — and click Check domain. - The result shows whether the domain is Blocked, and if eligible, that it can be Unblocked via KYC.
- If eligible, Create a request submits an unblock request for that domain.
🛒 Buy Traffic
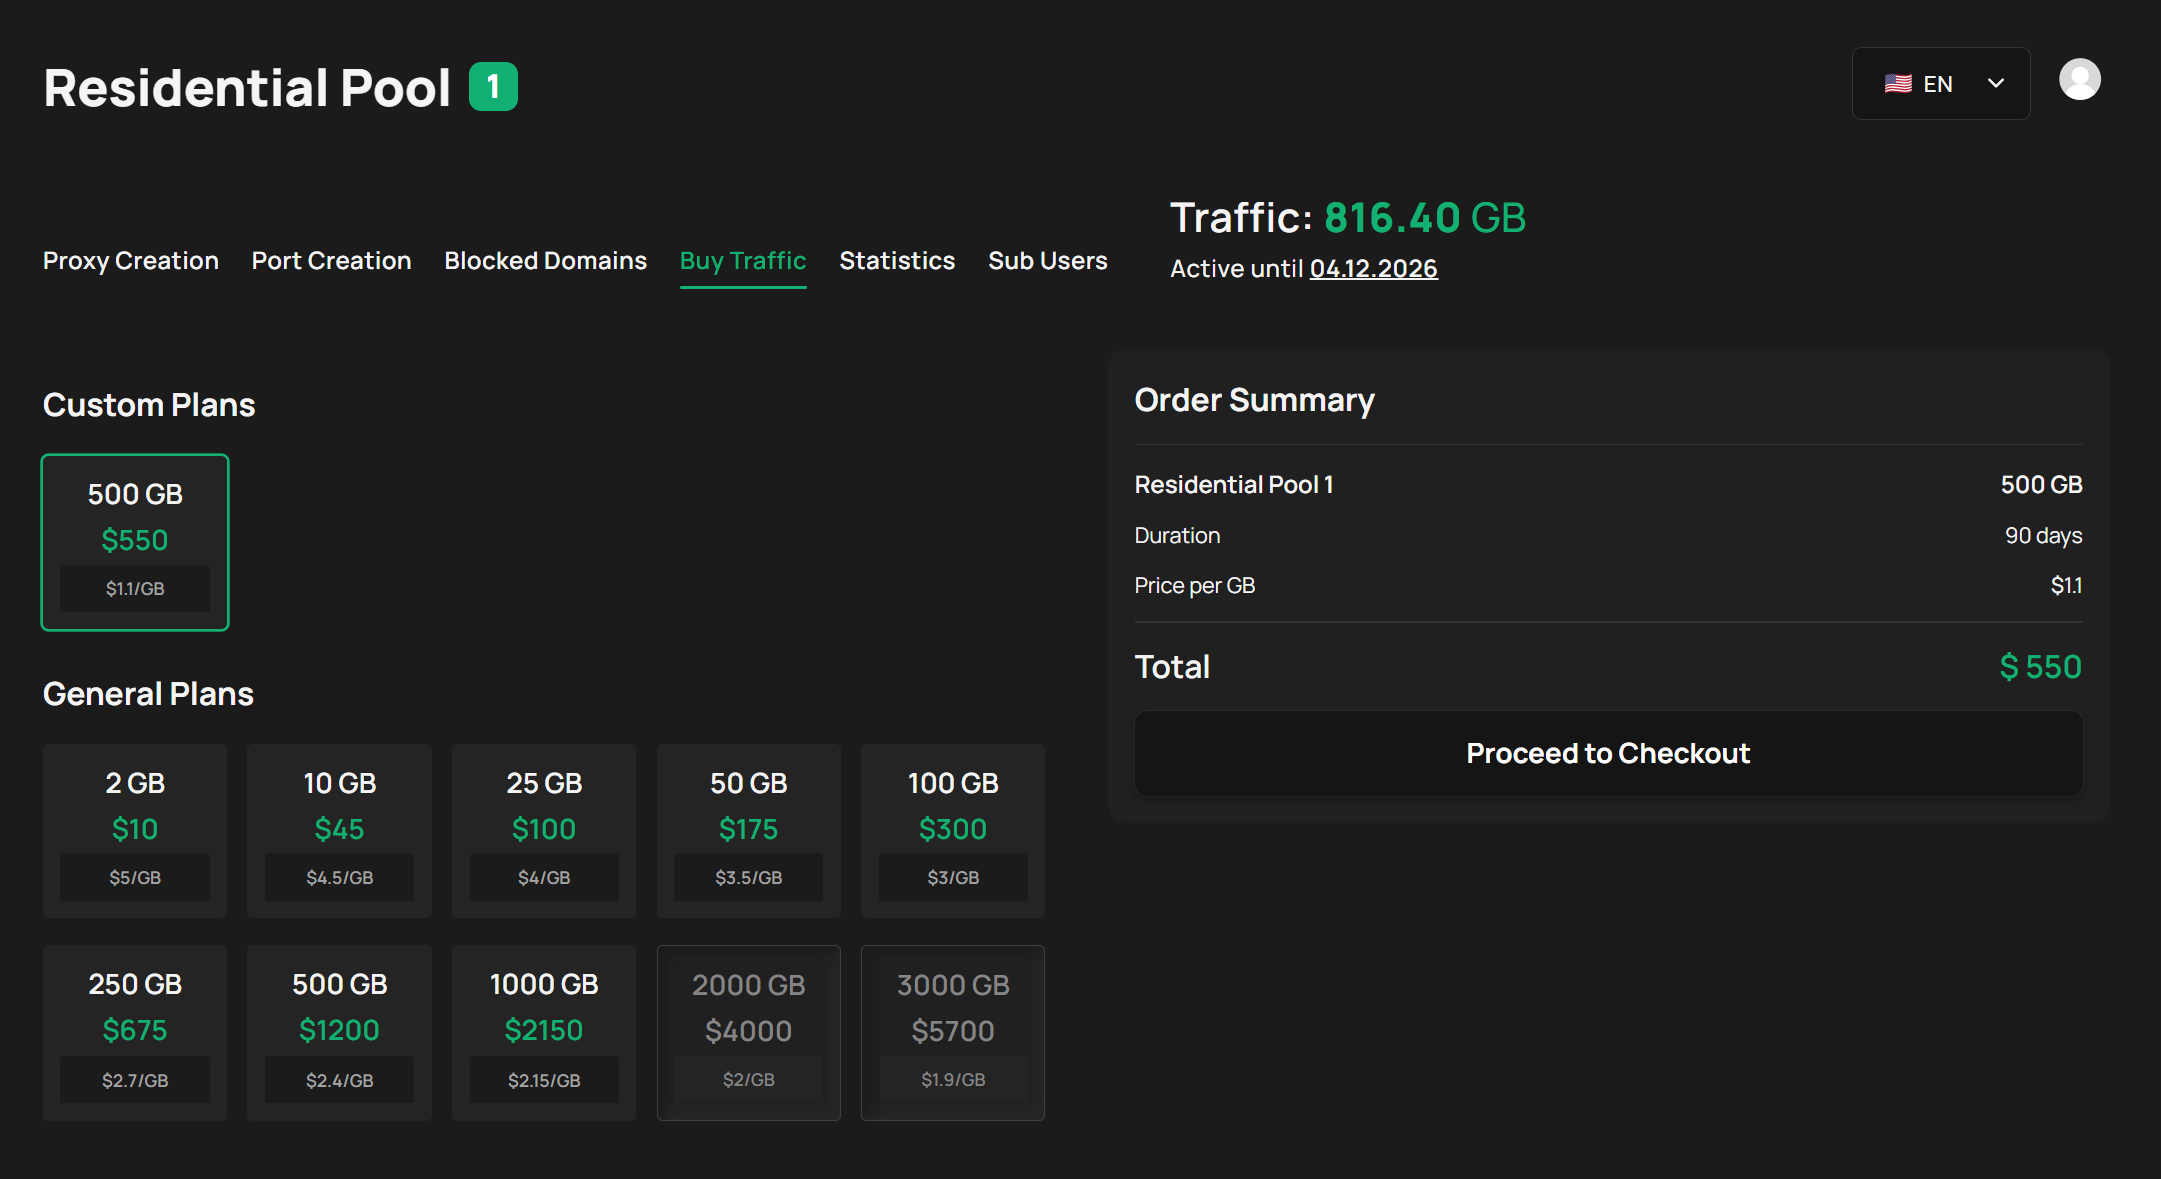
- Custom Plans — plans negotiated specifically for your account.
- General Plans — the standard traffic packages available to every account; larger packages carry a lower price per GB.
Selecting a plan shows an Order Summary — pool, GB amount, Duration, and Price per GB — before you continue to Proceed to Checkout.
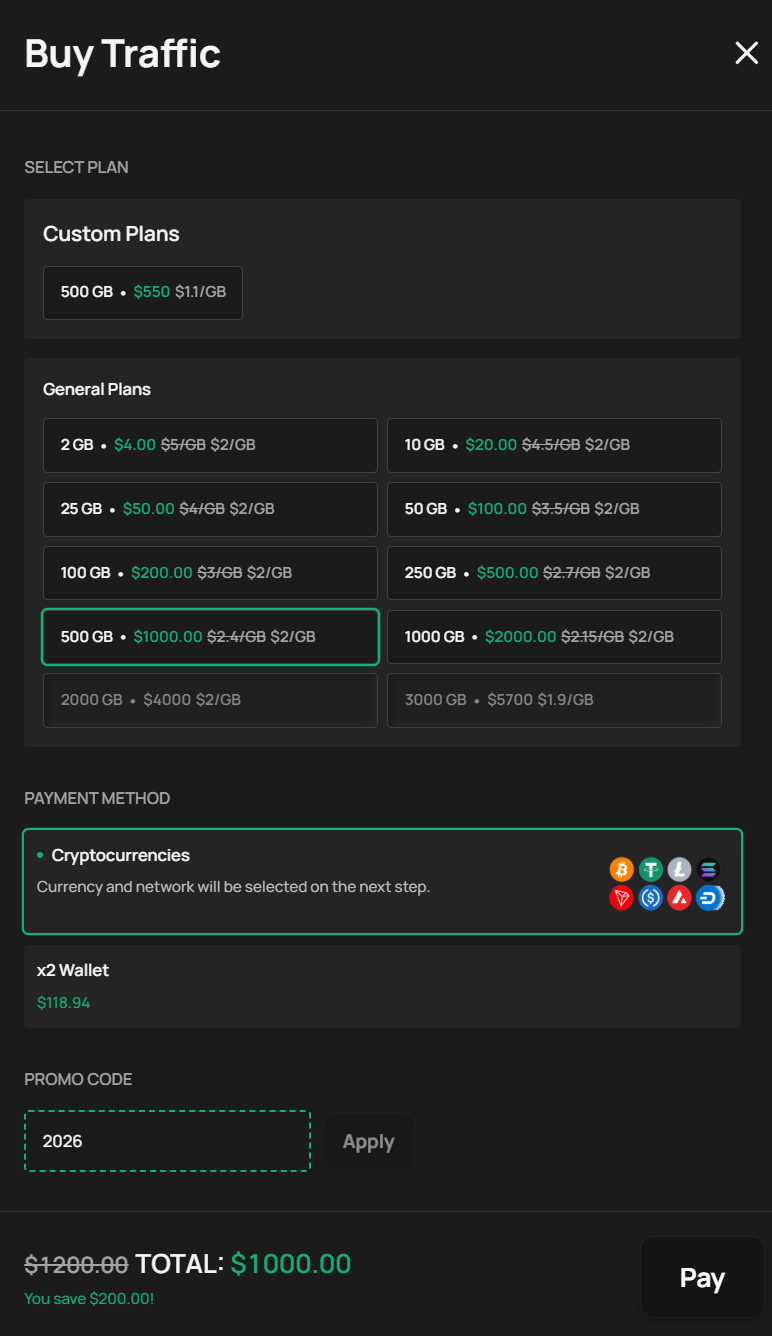
The Buy Traffic window that opens lets you confirm or change the selected plan (Select Plan), choose a Payment Method — Cryptocurrencies (the specific currency/network is picked on the next step) or your internal x2 Wallet balance — apply a Promo Code, and complete the purchase with Pay.
📊 Statistics
Filter usage data by date range, country, port, sub-user, or target domain.
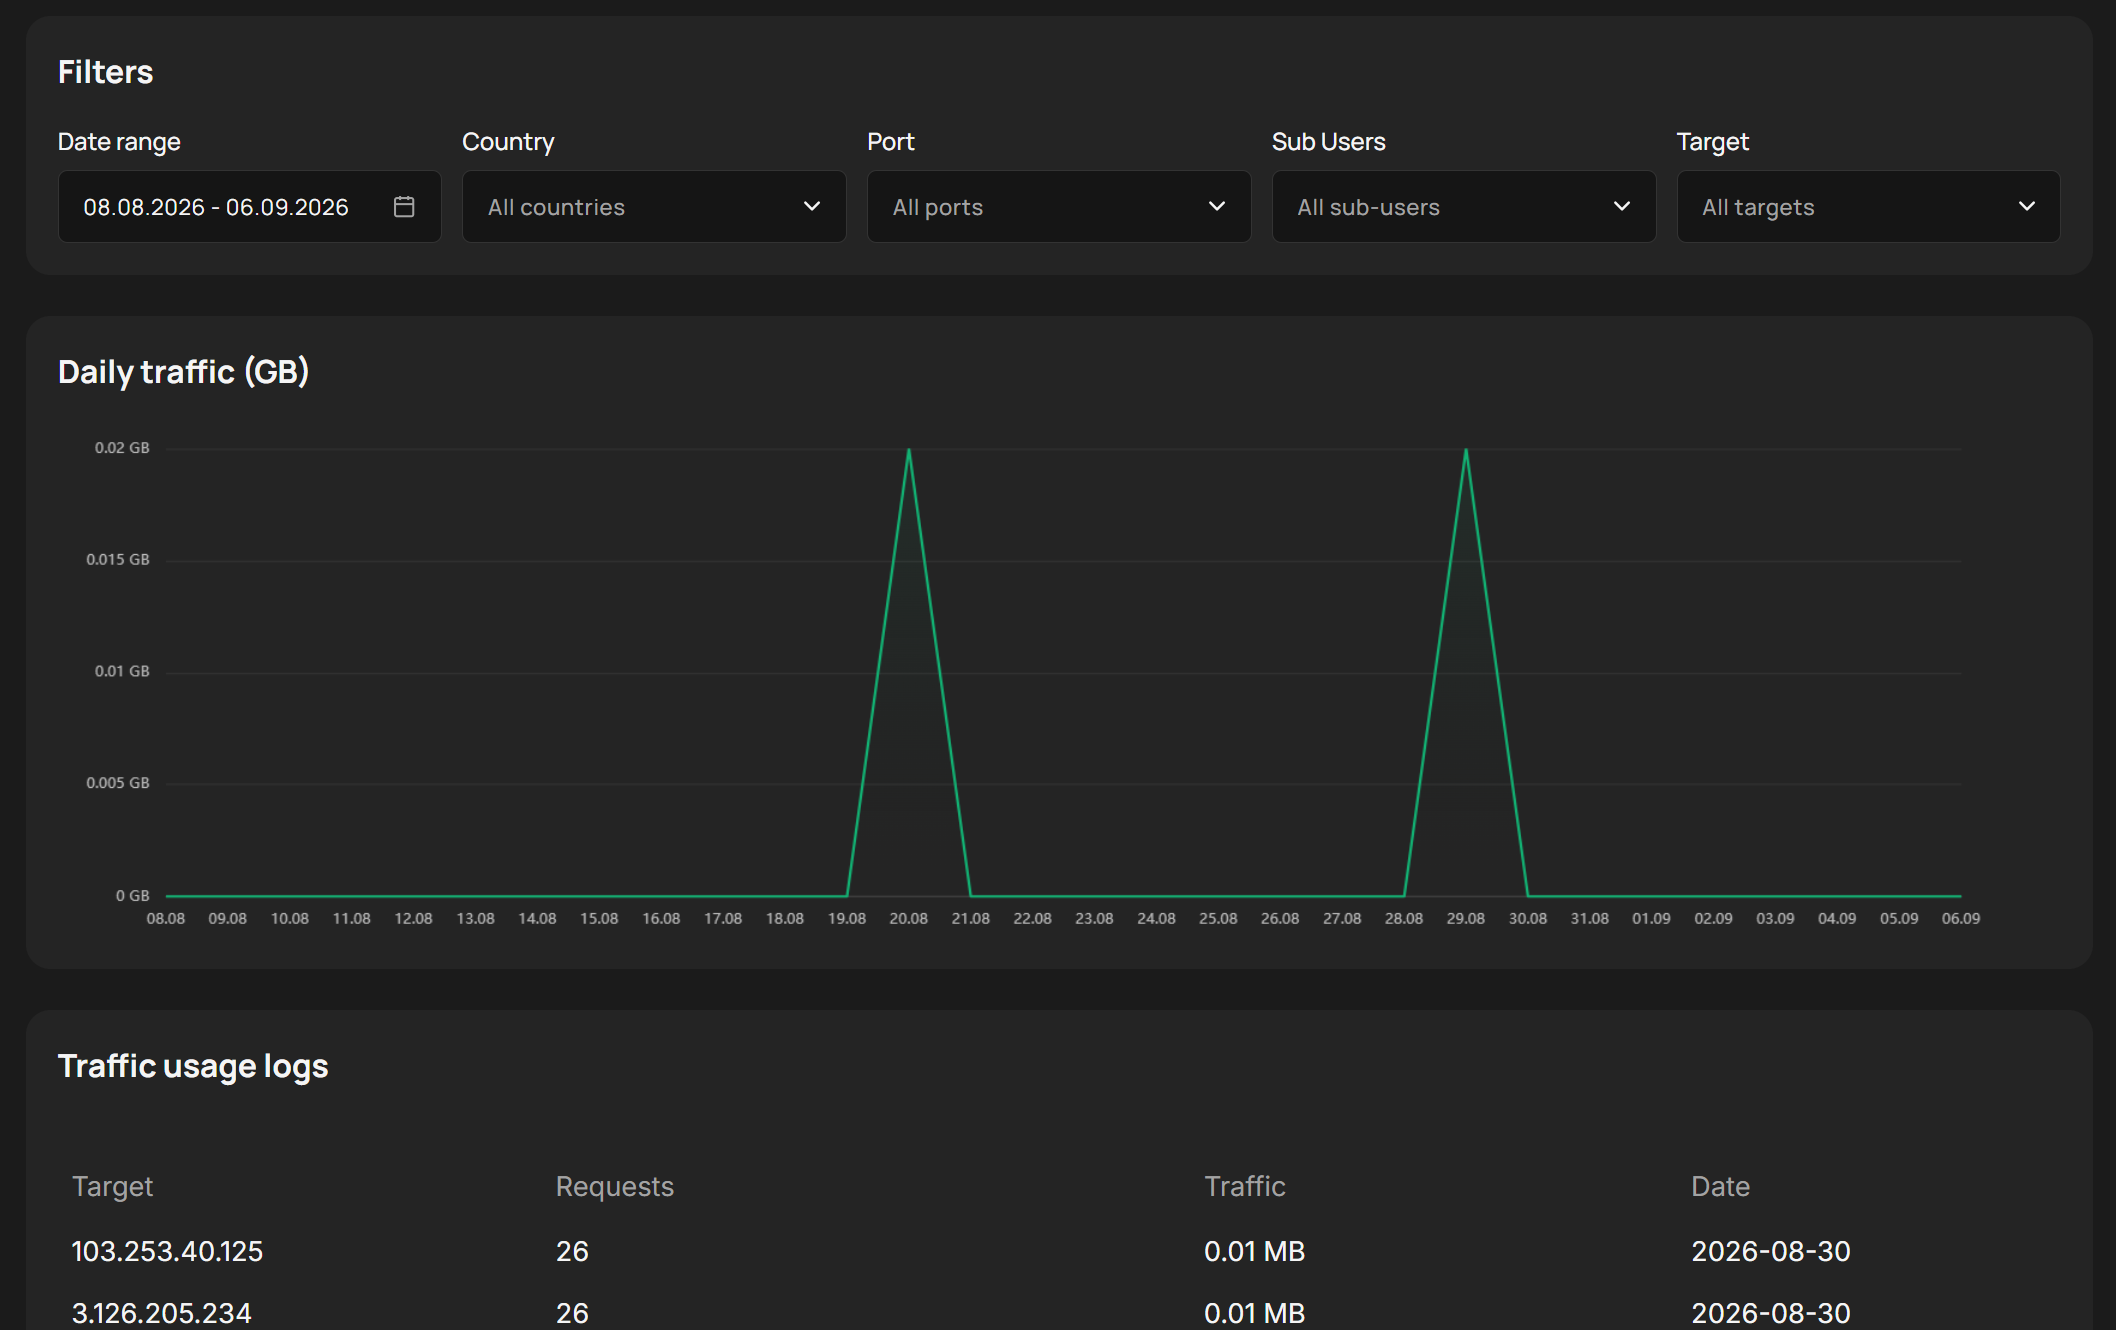
- Daily traffic (GB) — a chart of traffic consumed per day for the selected filters
- Traffic usage logs — a table of individual entries: target, requests, traffic, and date
👥 Sub Users
Manage the sub-user accounts that proxies and ports are generated under.
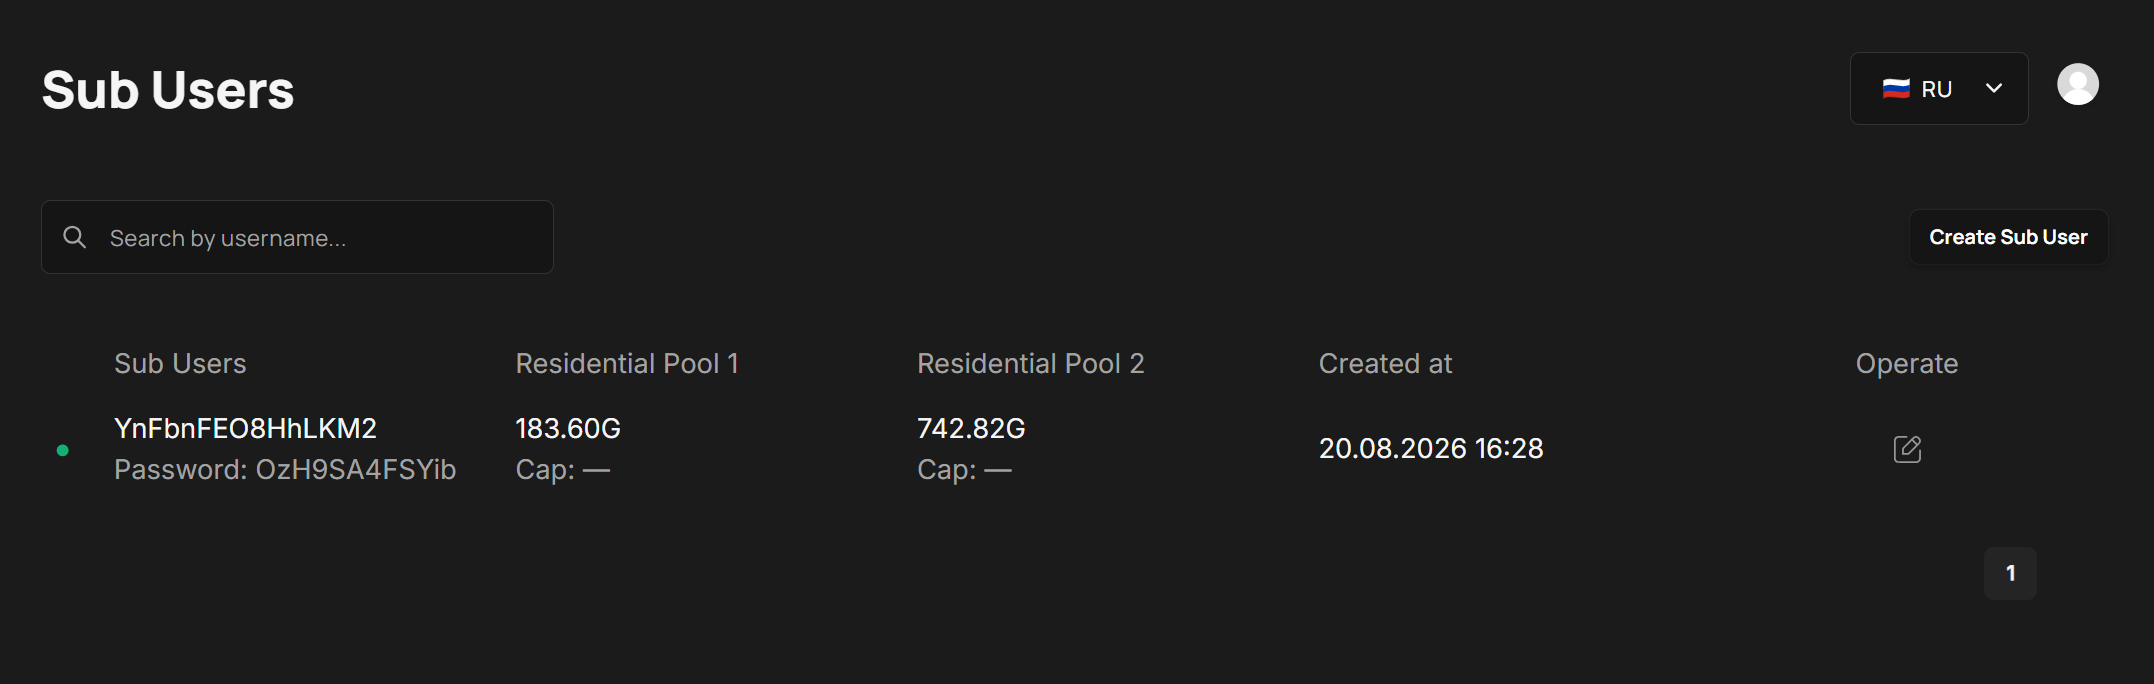
- Create Sub User — set a username and password
- Traffic caps — assign a cap per pool (
0= unlimited traffic for that pool); use Add pool to cap more than one pool at once - Status — Enabled / Disabled
The list can be searched by username. Each row shows the sub-user's credentials, its usage and cap per pool (e.g. Residential Pool 1, Residential Pool 2 — "Cap: —" means unlimited), its Created at date, and an online/offline status indicator; Operate opens the same form to edit any of it later. See Sub-Accounts for how caps and API access work in more detail.
Next: Proxy Format